












The Idea
Direct Answer (Alien Gambit at a Glance):
- Move Order:
1.e4 c6 2.d4 d5 3.Nc3 dxe4 4.Nxe4 Nf6 5.Ng5 h6 6.Nxf7!?- Creator & Year Invented: Created in 2021 by Bulgarian CM Volen Dyulgerov (Witty_Alien), popularized globally by IM Levy Rozman (GothamChess), IM Eric Rosen, and GM Hikaru Nakamura.
- Core Philosophy: White sacrifices a knight on
f7rather than retreating, permanently forfeiting Black’s castling rights, ripping open the light squares, and establishing a suffocating central clamp one5andg6.- Objectivity vs. Blitz Win Rate: Objectively unsound (-3.5 Stockfish 16 evaluation) and refuted at master level by
7...c5!, yet scores a 54% human win rate in online rapid and blitz games due to intense king-hunt panic.
| Metric | Alien Gambit Specification |
|---|---|
| Opening Classification | ECO B12 — Caro-Kann Defense, Tartakower / Alien Gambit |
| Signature Move Order | 1.e4 c6 2.d4 d5 3.Nc3 dxe4 4.Nxe4 Nf6 5.Ng5 h6 6.Nxf7!? |
| Inventor & Origin Year | CM Volen “Witty_Alien” Dyulgerov (Invented in 2021) |
| Stockfish 16 Evaluation | -3.5 (Depth 35 after 6...Kxf7 7.Nf3 c5!) |
| Human Blitz Win Rate | 54% White Wins / 4% Draws / 42% Black Wins (1200–2000 Elo) |
| Best Black Refutation | 7...c5! (Accepting) or 5...e6! (Declining on move 5) |
The Alien Gambit (1.e4 c6 2.d4 d5 3.Nc3 dxe4 4.Nxe4 Nf6 5.Ng5 h6 6.Nxf7!?) is one of the most explosive, controversial, and practically lethal opening weapons in modern chess.
At its core, the Alien Gambit targets the traditionally solid Caro-Kann Defense. After Black enters the Tartakower/Nimzowitsch variation (4...Nf6), White plays the provocative 5.Ng5!?. When Black reflexively plays 5...h6 to kick the knight, White detonates the knight directly on f7—dragging Black’s king into the open, permanently stripping castling rights, and leaving the light squares (e6, f7, g6) fatally compromised.
| White’s Move 7 System | Move Order | Strategic Goal | Best Black Defense |
|---|---|---|---|
| 🐍 Boa Constrictor Bind | 6...Kxf7 7.Nf3 | Clamp down on e5, play 8.Ne5+ Kg8 9.Bd3!, bury Black’s h8-rook, and launch a kingside piece swarm. | 7...c5! (destroys d4 anchor) |
| ⚔️ Direct King Pressure | 6...Kxf7 7.Bc4+ | Seize the a2-g8 diagonal with check, castle queenside (O-O-O), and hurl a f4-g4-f5 pawn storm. | 7...Nd5! (blocks diagonal) |
Who Invented the Alien Gambit & When Was It Created? (2021 Origin)
The Alien Gambit was invented in 2021 by Bulgarian Candidate Master (CM) and Twitch streamer Volen Dyulgerov, known across the chess world as Witty_Alien. Experimenting in 2021 with dynamic, psychological ways to bust the Caro-Kann Defense in 3-minute online blitz, Dyulgerov discovered that human opponents under clock pressure almost never find computer-accurate defenses against an exposed king on f7.
The opening exploded across mainstream chess culture in 2022–2024 when IM Levy Rozman (GothamChess) published his viral breakdown of the sacrificial mechanics, coining the “Boa Constrictor” moniker for White’s e5 knight bind. Subsequent high-level blitz sessions by GM Hikaru Nakamura and IM Eric Rosen cemented the Alien Gambit as the internet’s favorite anti-Caro-Kann psychological weapon.
👽 The Creator’s Ultimate Triumph: Witty_Alien Defeats Magnus Carlsen (2026)
On September 30, 2026, during the Chess.com Club Showdown, Alien Gambit creator Volen “Witty_Alien” Dyulgerov achieved one of the most sensational viral moments in online chess history by defeating World #1 Magnus Carlsen live in a 5-minute blitz game.
Facing Carlsen’s Vienna Game, Witty_Alien demonstrated the same fearless tactical tenacity that defines his namesake gambit—launching a counter-offensive and immediately punishing Carlsen’s blunder 20.Rde1?? with the crushing 20...Rb1+! 21.Kd2 Qd5+!, forcing Carlsen’s immediate resignation. The upset sparked a global media frenzy led by GothamChess (“WITTYALIEN DEFEATS MAGNUS CARLSEN!!!!!”), sending hundreds of thousands of players searching for Witty_Alien’s signature opening repertoire.
Is the Alien Gambit a Real Opening or Official Book Move?
Yes—the Alien Gambit is an officially recognized opening variation in modern chess databases, cataloged under ECO B12 (Caro-Kann Defense).
While classical 20th-century grandmaster manuals historically dismissed 6.Nxf7 as an unsound blunder due to computer refutations, both Chess.com and Lichess officially register the Alien Gambit by name as a book opening with over 100,000 recorded games. In classical over-the-board tournament play it remains objectively dubious (-3.5), but in online rapid, blitz, and bullet chess, it is a legitimate, high-scoring practical weapon.
Alien Gambit Move Order and Step-by-Step Setup
Mastering the move order requires understanding the exact psychological triggers on moves 5 and 6:
1.e4 c6: Black establishes the Caro-Kann Defense, intending solid central counterplay.2.d4 d5 3.Nc3 dxe4 4.Nxe4 Nf6: The Tartakower/Nimzowitsch line. Black challenges the centralized knight immediately rather than developing the bishop first.5.Ng5!?: The Bait. White moves the knight a second time, violating classical opening principles to eyef7and tempt an automatic pawn kick.5...h6: Played in over 85% of online blitz games. Black assumes White will meekly retreat6.Nf3.6.Nxf7!: The Alien Detonation. White sacrifices the knight onf7, forcing6...Kxf7and permanently shattering Black’s castling rights and light-square complex.
Alien Gambit Move-by-Move Flashcards
Swipe or jump to any key turning point below—or save individual annotated board cards for quick pre-game review.
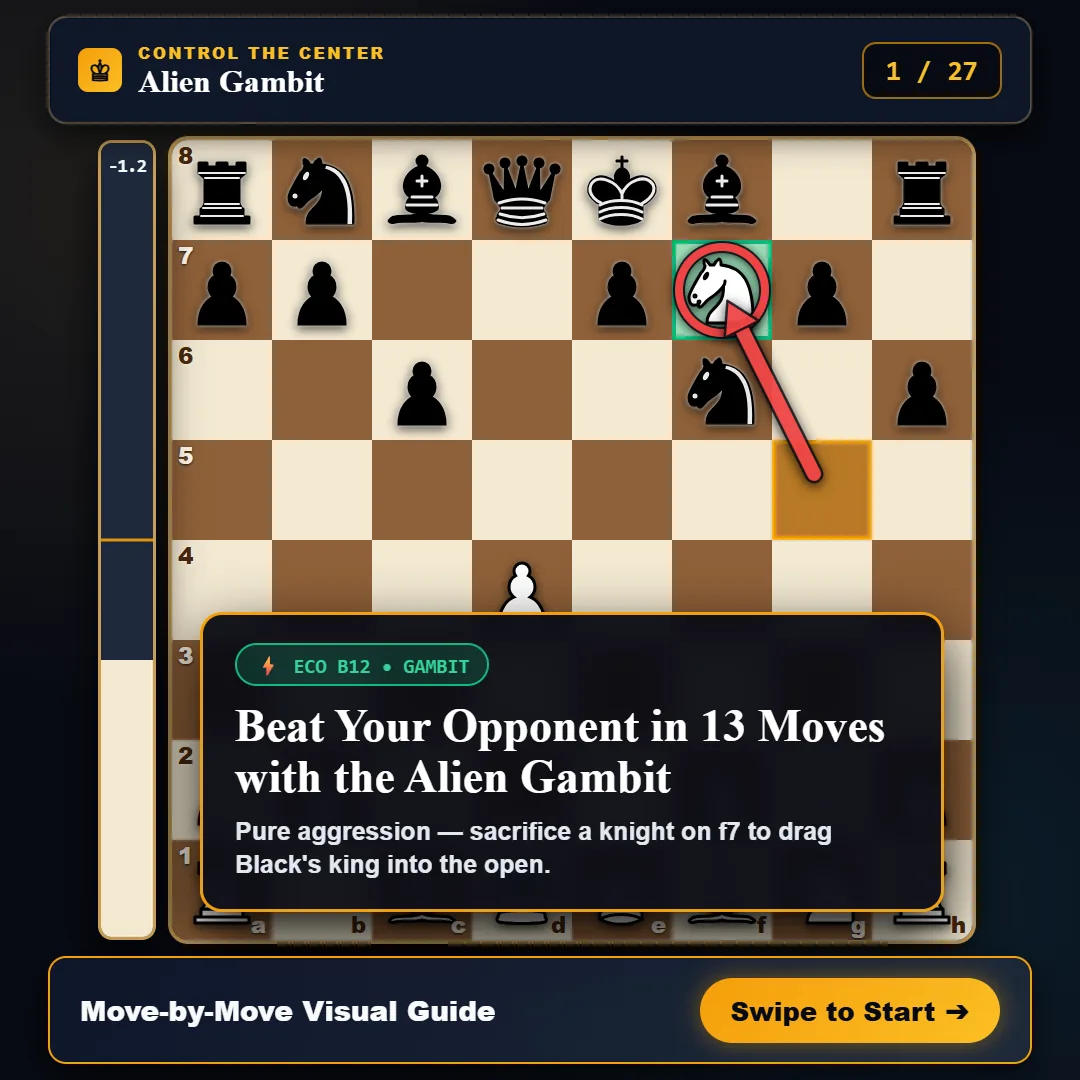
💡 Tip: Use the ← Prev / Next → buttons (or swipe on mobile) to walk through all 27 slides on demand.
Alien Gambit vs. Bishop f5 (4…Bf5 & 5…Bf5), Bonjour Variation & Martian Gambit
One of the most frequent questions Caro-Kann players ask is what happens when Black develops the light-squared bishop to f5 instead of playing into 4...Nf6 5.Ng5 h6:
1. Against the Classical Caro-Kann (4...Bf5): The Martian Gambit
If Black plays the Classical Caro-Kann (1.e4 c6 2.d4 d5 3.Nc3 dxe4 4.Nxe4 Bf5), playing 5.Ng5?! immediately is ineffective because Black has not played ...Nf6 and the f5-bishop already controls e4 and g6. Instead, Witty_Alien created its sister weapon, the Martian Gambit:
- Move Order:
5.Ng3 Bg6 6.h4 h6 7.Nf3 Nd7 8.h5 Bh7 9.Bd3 Bxd3 10.Qxd3 e6 11.Bf4 Ngf6 12.O-O-O - Idea: White hunts down Black’s prized light-squared bishop, castles queenside, and prepares positional sacrifices on
e6andf5.
2. When Black Plays 5...Bf5 After 4...Nf6 5.Ng5
If Black meets 4...Nf6 5.Ng5 by developing 5...Bf5 (protecting f7 indirectly and preparing ...e6 without weakening g6), White cannot sacrifice on f7 yet.
- White’s Best Response: Play
6.Bc4! e6 7.Ne2, clamping down on thea2-g8diagonal and preparingNg3to harass thef5-bishop while keepingf7under uncomfortable pressure.
3. The “Bonjour Variation” (4...Nf6 5.Ng5 Bg4!?)
Popularized in Witty_Alien’s streams, if Black gets tricky with 5...Bg4!? (attacking White’s queen), White responds with 6.f3 Bh5 7.Bc4 or 6.Be2 Bxe2 7.Qxe2 Qxd4 8.N1f3, gaining massive lead-in-development compensation.
Alien Gambit Win Rate & Stockfish 16 Evaluation
Why do grandmasters call the Alien Gambit “objectively terrible” while club players lose to it every day? The gap between computer perfection and human clock pressure is massive:
| Rating / Environment | White Win % | Draw % | Black Win % | Practical Verdict |
|---|---|---|---|---|
| Stockfish 16 (Depth 35) | 0% | 5% | 95% | -3.5 Eval — Black refutes with 7...c5! 8.Ne5+ Ke8! 9.Bd3 Qxd4!. |
| Online Blitz (1000–1600 Elo) | 56% | 3% | 41% | Black almost always plays passive 7...e6, falling into the e5 bind. |
| Online Blitz (1600–2100 Elo) | 52% | 4% | 44% | Even strong players panic with an uncastled king on f7/g8 under time pressure. |
⚡ Alien Gambit Practice & Interactive Tactical Puzzles
Want to test your tactical reflexes in the Alien Gambit? Drill the three critical moments that decide every game:
Exercise 1: Finding the Detonation (Move 6)
- Position: Black just played
5...h6. - White to Play: Spot White’s signature sacrifice
6.Nxf7!, dragging the black monarch into the crosshairs of your developing bishops. - 👉 Launch Interactive Board in Practice Mode
Exercise 2: Black’s Master Refutation (7...c5!)
- Position: White plays
7.Nf3. Black must not cower passively with7...e6. - Black to Play: Strike White’s center with
7...c5!, opening thed8-a5diagonal and defusing thee5knight bind.
Exercise 3: The Gotham Queen Snare (22.h4!)
- Position: White has clamped Black’s pieces onto the back ranks.
- White to Play: Find the suffocating pawn push
22.h4!, leaving Black’s queen with zero escape squares in broad daylight. - 👉 Drill Alien Gambit Repertoire Puzzles
🎯 White’s Attacking Arsenals on Move 7
Following 6...Kxf7, White possesses two radically different attacking philosophies:
1. The Boa Constrictor Setup (7.Nf3)
Rather than delivering an immediate, impulsive check, White calmly develops the kingside knight. This move controls the crucial e5 outpost while preparing:
8.Ne5+: Landing one5with check, forcing Black’s king to cower ong8.9.Bd3!: Directing an aggressive battery atg6andh7.10.f4!: Reinforcing the knight outpost with an iron pawn clamp.11.Qf3/11.Qh5: Orchestrating an unstoppable kingside piece swarm while Black’sh8-rook remains buried in the corner.
2. Direct King Pressure (7.Bc4+)
White immediately attacks along the vulnerable a2-g8 diagonal with tempo:
- If Black plays
7...e6, White continues with8.Nf3 Bd6 9.Qe2 Re8 10.Ne5+ Kg8. - If Black plays
7...Nd5, White responds with8.Qf3+ Kg8 9.Ne2 e6 10.Bd2 Qf6 11.Qb3, followed by queenside castling (O-O-O) and a crushing kingside pawn avalanche (f4-g4-f5).
🛡️ Black’s Defensive Blueprint & Refutations
| Move | Assessment | Engine Eval | Strategic Character |
|---|---|---|---|
7...c5! | The Grandmaster Refutation | -3.5 | Smashes White’s d4 anchor, opens the queen diagonal, and untangles with a decisive material advantage. |
7...Nd5 | The Central Fortress | -1.8 | Instantly blocks the c4-bishop diagonal, leading to stabilizing minor piece exchanges. |
7...e6 | The Human Defense | -1.0 (Dangerous) | Erects a pawn barrier but allows White’s 8.Ne5+ Kg8 9.Bd3!, entering the suffocating Boa Constrictor bind. |
5...e6! | Declining the Gambit | -0.4 | Refuses the bait on move 5, solidifying f7 and neutralizing all tactical tricks before they happen. |
⚡ Tactical Traps & The Iconic Queen Snare
The Gotham Queen Trap (22.h4!)
In IM Levy Rozman’s celebrated masterclass against a 2100-rated subscriber, White demonstrated how spatial asphyxiation traps Black’s queen in broad daylight:
7.Nf3 Nbd7 8.Bc4+ e6 9.Qe2 Nb6 10.Bb3 Bd6 11.O-O Re812.Ne5+ Kg8 13.c4 c5 14.dxc5 Bxc5 15.Bf4 Nbd7 16.Rad1 Qe717.Ng6 Qf7 18.Bc2 Nf8 19.Ne5 Qh5 20.g4 Qh4 21.Bg3 Qg5 22.h4!— Black’s queen has zero legal squares left.
The Scholar King Hunt Trap
If Black plays carelessly after 7.Nf3 e6 8.Ne5+ Ke8?:
9.Qh5+! Ke7 10.Qf7+ Kd6 11.Bf4!- If
11...Qe7, White delivers12.Ng6+ Kd7 13.Nxe7, winning the queen via discovered check. - If
11...Nd5, White plays12.Nc4#— a dazzling double checkmate on move 12!
For experienced players
“The Alien Gambit is objectively terrible, but practically terrifying. If you don’t know the exact move 7…c5!, you will spend the next twenty moves suffering in a cramped, suffocating nightmare.” — IM Levy Rozman
See also:Sacrifice·King Safety·Tempo·Controlling the center·Developing pieces