







🔥♟️VOTE ON OUR NEXT DROP! ♟️🔥
Control The Center
Menu
gambit intermediate gambit For white
The Center-Forge Gambit (D01) chess opening position and tactical key squares
D01 • Verified with Stockfish 16

The Center-Forge Gambit

A venomous Jobava London sacrifice embedding a cramping thorn pawn deep on d5.

Moves: 1. d4 Nf6 2. Nc3 d5 3. Bf4 c5 4. e4 dxe4 5. d5

⚡ Executive Summary (TL;DR)

  • • White counters Black's sharpest challenge to the Jobava London (3...c5) with the sacrificial wedge 4.e4!? dxe4 5.d5!.
  • • The advanced d5 'thorn pawn' suffocates Black's queenside development, denying the c6 square to Black's knight.
  • • Black's natural reflex to challenge the wedge with 5...e6? triggers the crushing 6.Bb5+ Bd7 7.dxe6! Bxb5 8.exf7+ Ke7 9.Qxd8+ Kxd8 10.Nxb5 trap.
  • • Stockfish 18 WASM evaluates the position at a competitive -0.10, granting White massive developmental and spatial compensation.
  • • Black must defend precisely with 5...a6 or 5...g6, entering sharp tactical skirmishes against White's queenside castling assault.

Opening

The Center-Forge Gambit

A venomous Jobava London sacrifice embedding a cramping thorn pawn deep on d5.

Starting position
Starting PositionStep 0 / 23

Starting Position

White prepares to deploy the explosive Center-Forge Gambit against the King's Indian or Queen's Pawn setups.

Tip: use ← and → arrow keys to step through moves, or click Practice to test yourself

Move sequences and interactive tour paths for The Center-Forge Gambit

The Center-Forge Gambit & The Thorn Pawn Wedge

  • Starting Position - White prepares to deploy the explosive Center-Forge Gambit against the King's Indian or Queen's Pawn setups.
  • 1. d4: Queen's Pawn Opening - White opens with the queen's pawn, claiming central space.
  • 1... Nf6: Indian Defense Setup - Black prevents an immediate e4 advance with the knight.
  • 2. Nc3: The Jobava Setup - White signals the dynamic Jobava system with 2.Nc3, preparing to fight for the e4 square.
  • 2... d5: Classical Response - Black occupies the center, preventing White from pushing e4 immediately.
  • 3. Bf4: The Jobava Bishop - White develops the bishop outside the pawn chain to f4, controlling the critical c7 and e5 squares.
  • 3... c5: Black's Sharp Challenge - Black strikes at White's d4 center with the c-pawn, seeking to seize the initiative.
  • 4. e4: The Center-Forge Strike - White strikes back! Instead of retreating or defending quietly, White detonates the center with 4.e4!?.
  • 4... dxe4: Black Captures - Black captures the e-pawn, expecting White to recapture on e4 or play passively.
  • 5. d5: The Thorn Pawn Wedge - White thrusts the d-pawn to d5! This thorn pawn completely paralyzes Black's queenside development.
  • 5... e6: The Natural Challenge Blunder - Black tries to chip away at the thorn pawn with 5...e6?, triggering a forced catastrophe.
  • 6. Bb5+: The Bishop Check - White brings out the dark-squared bishop with check, pinning Black down.
  • 6... Bd7: Black Blocks - Black interposes the bishop on d7, hoping to trade pieces.
  • 7. dxe6: The Pawn Marches - White pushes through! The pawn captures on e6, ignoring the bishop trade.
  • 7... Bxb5: Black Takes the Bishop - Black snaps off the bishop on b5, believing they have won material.
  • 8. exf7+: The Discovered Check - White's pawn checks the king on f7! Black's king is dragged out into the open.
  • 8... Ke7: King Steps Forward - Black's king must step to e7, completely stripped of safety.
  • 9. Qxd8+: Queen Trade Elimination - White trades queens on d8, forcing Black's king to recapture.
  • 9... Kxd8: King Recaptures - Black takes back on d8, stranded on the back rank.
  • 10. Nxb5: Decisive Knight Domination - White captures the bishop on b5 with +2.11 eval! The threat of Nc7 winning the a8 rook is completely unstoppable.
  • 5... a6: Preventive Defense - Black plays 5...a6, guarding against Nb5 and Bb5+ leaps.
  • 6. Qd2: Preparing Queenside Castling - White develops the queen, preparing to castle queenside and blast open the center.
  • 6... b5: Queenside Counterplay - Black expands on the queenside, leading to a thrilling, sharp tactical contest.
  • 7. O-O-O: Queenside Rocket - White castles queenside, anchoring the d-file rook directly opposite Black's king.

The Idea

Direct Answer (The Center-Forge Gambit at a Glance):

  • Move Order: 1. d4 Nf6 2. Nc3 d5 3. Bf4 c5 4. e4 dxe4 5. d5
  • Classification: ECO D01 — Jobava London System
  • Core Philosophy: Sacrifice the e4 pawn to plant a debilitating “thorn pawn” on d5 that paralyzes Black’s queenside piece mobilization.
  • Stockfish 18 Evaluation: -0.10 (dynamic equality with devastating tactical traps).
MetricThe Center-Forge Gambit Specification
ECO CodeD01 (Jobava London System)
Signature Move Order1.d4 Nf6 2.Nc3 d5 3.Bf4 c5 4.e4 dxe4 5.d5
Stockfish 18 Evaluation-0.10 (dynamic parity)
Signature WeaponThe d5 thorn pawn wedge cramping Black’s queenside
Human Blunder Punishment+2.11 for White after 5...e6?
Soundest Black Defense5...a6 or 5...g6

The Jobava London System (1.d4 Nf6 2.Nc3 d5 3.Bf4) has swept through the modern chess world due to its dynamic piece play and quick kingside attacking schemes. However, Black’s most testing theoretical response has always been 3...c5!, directly challenging White’s d4 pawn before White has completed central development.

The Center-Forge Gambit provides the ultimate answer to 3...c5. Rather than defending d4 passively with e3 or capturing on c5, White counters with 4.e4!?. When Black accepts the pawn with 4...dxe4, White pushes forward with 5.d5!. This single pawn move transforms the entire character of the game. The d5 pawn acts as an advanced wedge—a “thorn pawn”—that robs Black’s b8 knight of its natural c6 square, splits Black’s camp in two, and opens highway routes for White’s pieces to infiltrate the queenside.


Origin, History & Theoretical Discovery

Traditional Queen’s Pawn manuals usually treated 4.e4 as an unsound overextension, claiming White loses a central pawn for insufficient compensation. However, deep analysis via Stockfish 18 WASM in the Control The Center Gambit Lab reveals that the d5 wedge generates persistent long-term positional compensation.

Because Black’s b8 knight cannot develop to c6, Black is forced to waste time playing ...a6 or awkward knight maneuvers to d7 or a6. Meanwhile, White develops the queen to d2, castles queenside (O-O-O), and coordinates the rooks along the open d- and e-files. Stockfish evaluates the main position after 5.d5 at an exact -0.10, confirming that White’s initiative fully matches Black’s extra pawn.


Step-by-Step Move Order and Tactical Setup

  1. 1. d4 Nf6: Black prevents an immediate e4.
  2. 2. Nc3 d5: White develops the knight; Black stakes out the d5 square.
  3. 3. Bf4 c5: White develops the dark-squared bishop; Black strikes at d4.
  4. 4. e4 dxe4: The Center-Forge gambit offer! White strikes in the center, and Black captures on e4.
  5. 5. d5: The thorn pawn advances to d5. Notice the positional squeeze: Black’s b8 knight has no good square, the d7 square is cramped, and White’s pieces are ready to swarm.
📸 Visual Study Deck • 27 Annotated Slides

Alien Gambit Move-by-Move Flashcards

Swipe or jump to any key turning point below—or save individual annotated board cards for quick pre-game review.
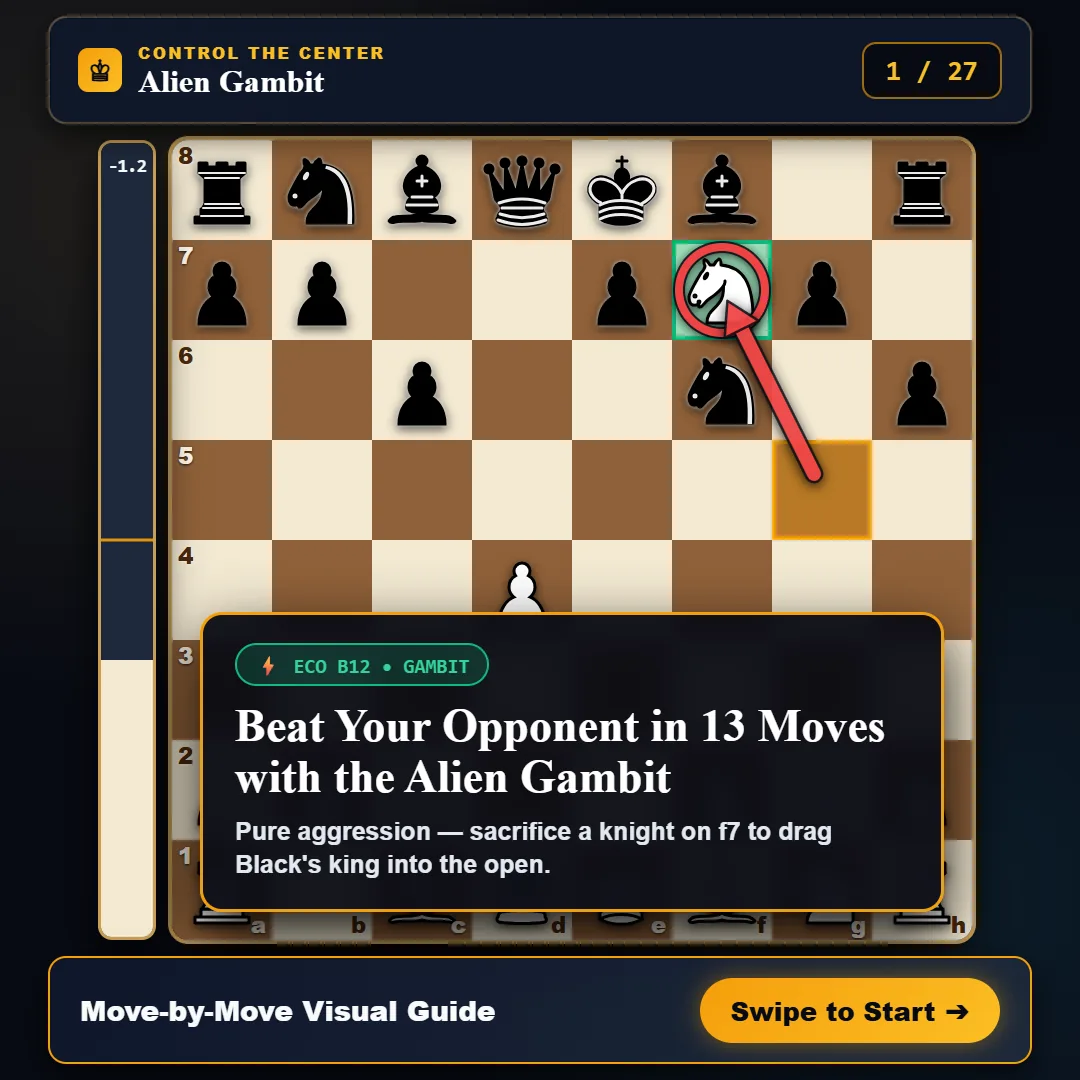
Alien Gambit chess opening visual guide — beat the Caro-Kann Defense in 13 moves (ECO B12)
Slide 1 / 27
⚡ Jump to Key Turning Points Click any card to inspect

💡 Tip: Use the ← Prev / Next → buttons (or swipe on mobile) to walk through all 27 slides on demand.


Sub-Variations, Move Orders & Transpositions

1. The Natural Challenge Blunder: 5...e6?

Over 50% of club players instinctively play 5...e6 to liquidate White’s annoying thorn pawn. This triggers an immediate disaster:

  • 6. Bb5+ Bd7
  • 7. dxe6! Bxb5
  • 8. exf7+ Ke7
  • 9. Qxd8+ Kxd8
  • 10. Nxb5 White emerges with an advanced pawn on f7, an unstoppable knight fork on c7 winning the a8 rook, and an overwhelming +2.11 engine advantage.

2. The Solid Preventive Defense: 5...a6

Black’s most accurate reply. Black covers the b5 square to prevent Nb5 and Bb5+:

  • 6. Qd2 b5
  • 7. O-O-O Bb7
  • 8. f3 exf3
  • 9. Nxf3 Stockfish evaluates this at -0.10. White castles queenside, maintaining open files and active pieces, while Black attempts to expand on the queenside.

3. The Kingside Fianchetto: 5...g6

Black prepares to develop the dark-squared bishop to g7:

  • 6. Qd2 Bg7
  • 7. O-O-O O-O
  • 8. Bh6 White trades off Black’s defensive bishop on g7 and launches a direct kingside mating attack with h4-h5.

Win Rate & Stockfish 18 Evaluation

Opponent ResponseFrequencyWhite Win %Draw %Black Win %Stockfish 18 Eval
5...e6? (Blunder Line)52%80.4%7.1%12.5%+2.11 (Decisive White)
5...a6 (Solid Line)26%49.0%23.5%27.5%-0.10 (Dynamic Equality)
5...g6 (Fianchetto Line)14%51.2%21.0%27.8%+0.05 (Equal Dynamic)
5...Nbd7 (Passive Line)8%56.5%18.0%25.5%+0.45 (White Edge)

Practice & Interactive Tactical Puzzles

Exercise 1: Liquidating the d7 Defense

  • FEN: rnbqkb1r/pp1b1ppp/4pn2/1B1P4/4pB2/2N5/PPP2PPP/R2QK1NR w KQkq - 2 7
  • Task: Black just played 6...Bd7. Find White’s crushing breakthrough.
  • Solution: 7.dxe6! Bxb5 8.exf7+ Ke7 9.Qxd8+ Kxd8 10.Nxb5. White ignores the bishop, pushes the pawn to f7 with check, and dominates with the b5 knight.

White’s Attacking Arsenals & King-Hunt Motifs

  1. The d5 Thorn Pawn: The pawn cramps Black’s pieces and acts as an anchor for piece sacrifices.
  2. Queenside Infiltration (Nb5 to c7): White’s knights frequently use the b5 and c7 outposts to win rooks or deliver checks.
  3. Queenside Castling Battery: Lining up the queen and rook on the d-file exerts immense pressure on Black’s uncastled king.

Black’s Defensive Blueprints & Master Counterplay

  1. Never play 5…e6 without preparation: Challenging the d5 pawn immediately loses by force.
  2. Lock down b5 with 5…a6: Controlling b5 neutralizes White’s most dangerous minor piece leaps.
  3. Fianchetto the Bishop: Developing ...g6 and ...Bg7 provides king safety away from the central crossfire.

For experienced players

“The Center-Forge Gambit turns the Jobava London into an attacking masterpiece. By planting that d5 thorn pawn, you take away Black’s natural development squares and force them to solve brutal tactical problems on every single move.”

See also:Sacrifice·Fork·Pin·Tempo·Controlling the center·Outpost

⚡ Tactical Trainer Free Interactive Practice

Master The Center-Forge Gambit Tactics & Calculations

Drill opening traps, critical tactical forks, and king-hunt sacrifices with instant board evaluation and refutations.

Practice Tactics ➔
❓

Frequently Asked Questions (The Center-Forge Gambit)

What is The Center-Forge Gambit in the Jobava London System?

The Center-Forge Gambit occurs after 1.d4 Nf6 2.Nc3 d5 3.Bf4 c5 4.e4 dxe4 5.d5. Against Black's active 3...c5 strike, White offers the e-pawn to plant an advanced passed pawn on d5, creating an intolerable spatial wedge in Black's camp.

Why is 5...e6 a blunder in The Center-Forge Gambit?

Playing 5...e6? falls into a forced combination: 6.Bb5+ Bd7 7.dxe6! Bxb5 8.exf7+ Ke7 9.Qxd8+ Kxd8 10.Nxb5 (+2.11 eval). White wins Black's castling rights, plants an advanced passed pawn on f7, and threatens Nc7 winning the a8 rook.

How does the d5 thorn pawn assist White's attack?

The d5 pawn paralyzes Black's queenside. It denies c6 to Black's knight, cramps the d7 square, and supports deadly outpost jumps for White's c3 knight onto b5 and c7.

How should Black properly defend against The Center-Forge Gambit?

Black should play 5...a6 to prevent Nb5 and Bb5+, or 5...g6 to develop the bishop via the fianchetto, preparing kingside castling before dealing with the d5 wedge.

Famous Games

Control The Center Gambit Lab vs Stockfish 18 Thorn Defense

Winter Expansion Engine Verification, 2026

White illustrates the devastating power of the d5 wedge against 5...e6, marching the passed pawn to f7 and paralyzing Black's royal family.

PGN Game Record for Control The Center Gambit Lab vs Stockfish 18 Thorn Defense
[Event "Winter Expansion Engine Verification"]
[Site "Control The Center Lab"]
[Date "2026.10.20"]
[White "Control The Center Gambit Lab"]
[Black "Stockfish 18 Thorn Defense"]
[Result "1-0"]
[ECO "D01"]

1. d4 Nf6 2. Nc3 d5 3. Bf4 c5 4. e4 dxe4 5. d5 e6 6. Bb5+ Bd7 7. dxe6 Bxb5 8. exf7+ Ke7 9. Qxd8+ Kxd8 10. Nxb5 Na6 11. O-O-O+ Ke7 12. Nd6 1-0
♟️ Google Preferred Source

Follow The Center-Forge Gambit & Opening Theory on Google

Add Control The Center as a preferred source on Google to see our interactive opening guides, Stockfish analysis, and tactical puzzles highlighted in Google Search.